This week’s project is the rough sketch of a new piano piece I’m working on. I came up with it on Tuesday evening and ran a quick video to capture the idea.
I recorded a cleaner version with a condensor mic this morning, but it’s really just rough material still that needs to be composed and edited, so the rough sketch will suffice for now.
This piece was inspired by the autumn season. I captured a nice photo the other day of beautiful orange-gold autumn colors that were interrupted by a short, gentle rain. All this while the sun was still shining…it was a beautiful scene that lasted only a few minutes before the rain was gone and the colors changed.
I realized something partway through last week’s project with the Bliptronic 5000. One of the things that makes the Bliptronic such a fun musical toy is the fact that you can take it everywhere, thanks to its built-in speaker. Within a few days of having it, I’d used it in my studio, in the living room sitting on the piano, and in the dining room while playing guitar. Therefore, I decided to make week 43’s project a video that showed me using the Bliptronic throughout the day in the normal places I go.
I started out on a beautiful, crisp autumn morning, with just the Bliptronic and a bench.
During my late-morning coffee break, I set up the Bliptronic on my desk and played for a few minutes.
Later in the day, I retreated to a great space in the school I work at to play for a few more minutes. Since my school used to provide a full range of services, including hearing tests, there are a pair of soundproof rooms, complete with ancient hearing test equipment!
After band rehearsal at church, I snuck in a few minute of playing volume-pedal guitar along with the Bliptronic.
I pulled over at a gas station on my way home and rolled down the window to get some night ambience along with the Bliptronic’s tones.
Upon arriving home, I propped the Bliptronic up on our piano and accompanied it with some dark minor-key chords.
I ended up in my studio, where I brought things to a close. This was a really fun video, made possibly by Kent Kingery’s generous donation of a Bliptronic 5000. Thanks again, Kent!
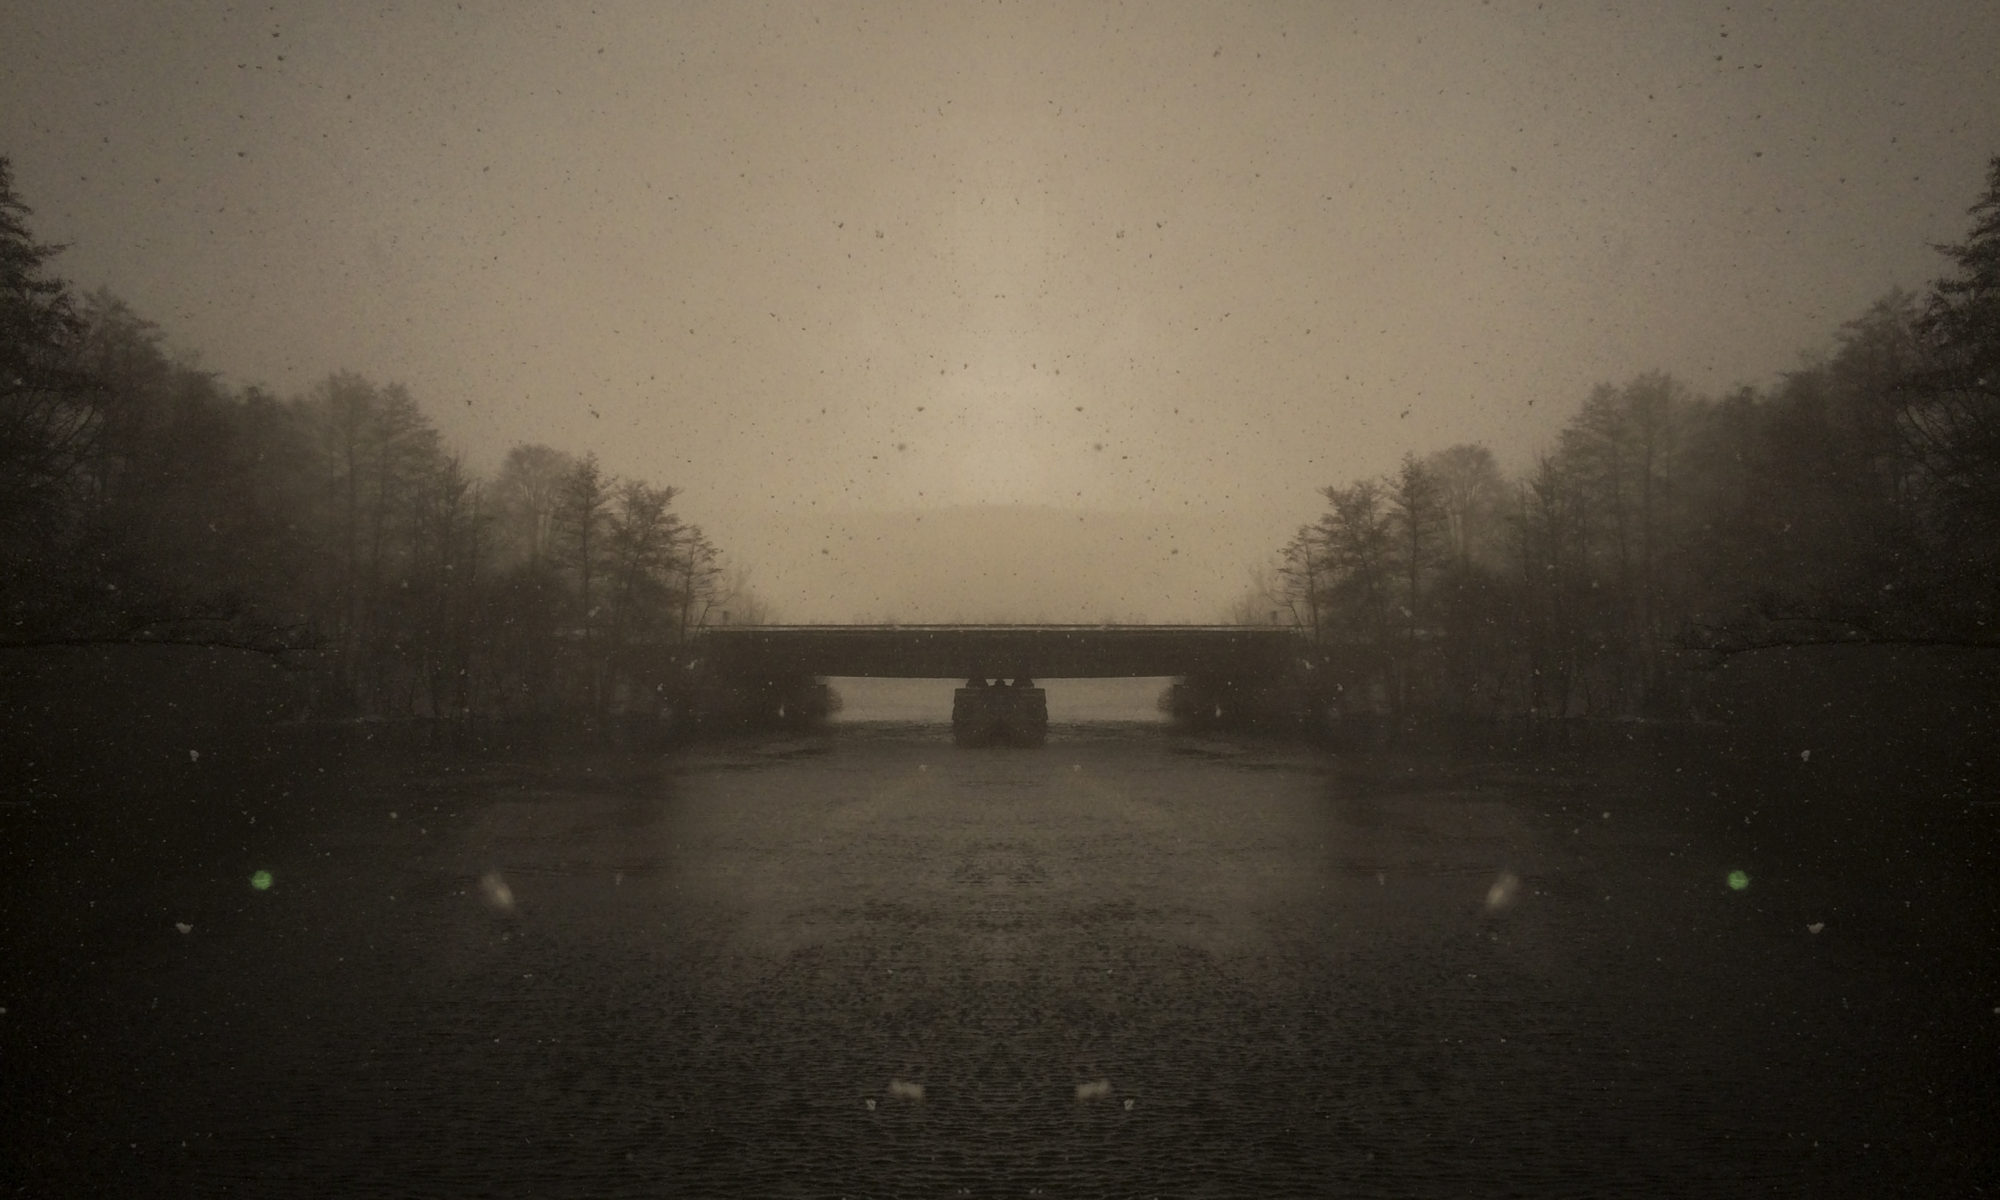
This past Thursday was a beautiful foggy morning, and it yielded this short video. It’s sort of a poem, in a way.
I recorded the video using my Canon T1i DSLR, shooting in 720p HD. The lens was a Yashica 55mm Macro ML, mounted using a C/Y to EF adapter. This allowed me to manually control the aperture and do nice, smooth focus changes. Audio for the video came from the on-camera microphone plus additional field recordings using the rig below.
I have access to an Eee PC netbook running Windows XP, along with an Audio-Technica AT2020 USB condensor microphone. This is an amazingly competent little recording rig, able to easily be carried into the field and run off battery power for quite a while.
Since the AT2020 is powered over USB, one cable is all that’s needed to connect the microphone to the laptop, and Audacity (free open-source recording software) handles the audio recording nicely.
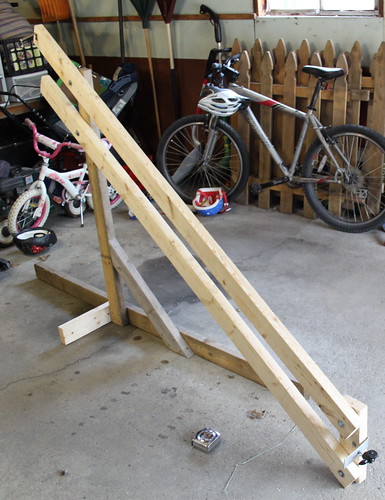
I basically followed the same idea as the colvins.ca version mentioned above. This is very much a version 1.0 project, however, as there are a number of things that could be much improved. For one thing, the colvins.ca version uses 2″x2″ lumber, and when I picked up lumber for this project, I got 2″x4″ lumber. That makes the crane arm twice as heavy as it could be, although maybe it resists deflection (bending) more, too. There are other future improvements I’ll mention along the way.
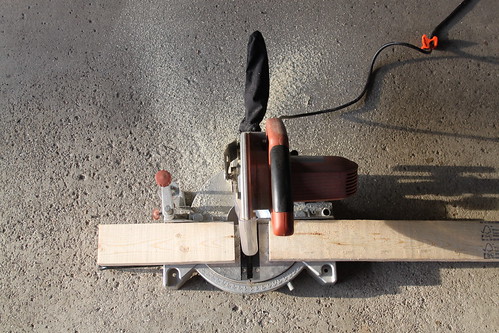
To start with this project, I measured out the 2x4s and cut off a 14″ section from each one, so the crane arm is just under 7 feet long. Then I drilled holes in the long sections, to allow the whole arm assembly to be bolted together.
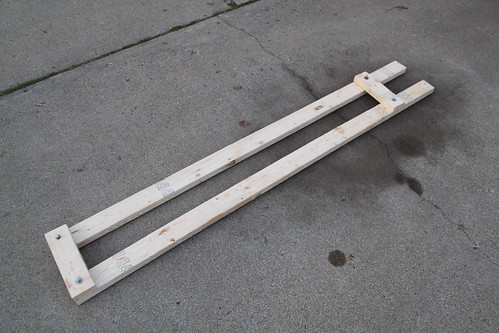
After I had assembled the crane arm (using a small piece on the end to hold the whole thing together temporarily), I built a quick-and-easy stand. The colvins.ca article mentioned using a work light stand (which I have!) but it wasn’t working for me – the stand wasn’t sturdy enough, and I didn’t feel like fabricating the necessary bracket, so I just built a version using 2×4 lumber.
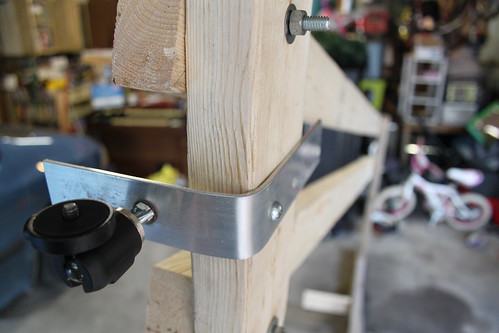
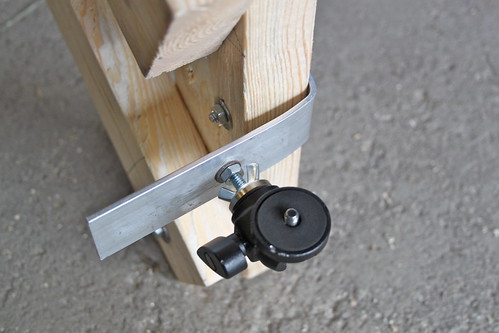
For the end where the camera attaches, I used a piece of flat aluminum stock, bent at a 90-degree angle and bolted to the end of the crane arm. A standard 1/4 x 20 bolt comes through the end, and a Manfrotto Micro Ball head attaches to that to give the camera a forward-looking orientation.
I didn’t get much of a chance to shoot test footage yet, as I only finished it late this afternoon, but I did get a couple of quick shots before I had to put it away. You can see the test footage here:
Things that could be much improved:
The stand is pretty wobbly – the vertical 2×4 is somewhat warped, and it only has ground support on one side.
It would be great to make the whole thing much more portable. I’m thinking of something perhaps made from PVC pipe or something similar that could be quickly assembled, but broken down into smaller pieces for transportation (4-foot long sections at maximum would make this much easier to take other places).
The bracket that the camera attaches to is pretty bare-bones; it’s not that stable, and it would be nice if the bolt that the ballhead and camera attach to was vertically oriented.
There’s no way to see the camera’s output, so a small video monitor would be a good addition
Long-term, I’d like to use pan/tilt brackets and servomotors to make the camera remotely controllable!
For now, I’m quite pleased with this version 1.0 jib/crane, and I’m looking forward to shooting some more interesting video with it.
I’m pleased to announce that Part 2 of the “chromedecay behind the scenes: bill van loo live performance rig” video is now available on Vimeo. (Part 1 is also available).
This 18-minute video shows me demonstrating my live electronic music performance rig. Part 2 covers using Ableton Live with TouchOSC and OSCulator, pad and keyboard controllers, and overall concepts of live performance.
Background information: all this video was shot a few months ago, in a whirlwind evening of setting up cameras, assembling gear, taking test shots, checking lighting levels in my living room, rigging cables, keeping my cats off the table I was using, fighting with my MiniDisc recorder’s microphone, and me waving my hands a lot. This week I finally finished editing it all in Final Cut Express, and I’m now thoroughly sick of the “rendering video” progress indicator. I’m quite pleased with the end result, though!
My friend Kent inquired privately about the technical details from Part 1, so I thought I’d include that here.
TECHNICAL INFORMATION
This video was recorded with 2 cameras; a Panasonic Lumix DMC-FZ18 was used for the head-on shots, and a Canon Powershot SD1000 was used for the overhead shots. All video was recorded in SD 640×480 format due to the cameras used. Editing was performed with Final Cut Express.
Screen captures were done with iShowUHD screen recording software for the Mac.
Voiceovers were recorded with a Rode NT1 into Logic Express 7, then exported for inclusion into the project. External audio was captured onto minidisc, then imported into Logic Express, edited, and exported & synced in Final Cut Express.
One thing I’ve learned about myself over the years is that I love teaching and sharing knowledge. This led directly into my chosen profession as a technology educator, and also shows itself in other ways, including making demonstration videos.
I’m really pleased to be able to offer this week’s 52 things project: Part 1 of a 2-part series describing and demonstrating my live electronic music performance rig. Part 2 will be posted as next week’s update.
In addition to making this video available, I’ve also been busy taking photographs this past week. On Monday night, I did a quick session in the chromedecay studio, shooting self-portraits so I’d have a new profile picture for Facebook and other social media sites.
Here’s the self-portrait I ended up deciding upon:
This was shot with a Panasonic Lumix DMC-FZ18, with an external SunPak flash triggered by optical digital slave. I’ll write more about this setup at a later time. Upon reflection (no pun intended), I’d probably add a reflector on the right to fill in some of the shadows on the right side of my face, but I’m well enough pleased for now.
Here’s another shot I liked from that session. It’s cropped to a ultra-widescreen aspect ratio to get rid of the glare from a poster that’s directly above me; light was bouncing back off the acrylic from the poster frame, due to the flash pointing at it, so I cropped it out and got this:
I also took advantage of the winter weather to shoot some outdoor photos. Here are a couple of favorites; these are both long exposures taken at night.


")