11/52: DIY USB foot controller, part 1

For this week’s project, I decided to turn an old wireless USB number pad into a foot controller for Ableton Live. Here’s what I started with:

IMG_0654

I was partially inspired to take on this project after seeing this thread on Create Digital Music last year:

Sexy DIY Footswitch for Music, Using the Brain of a USB QWERTY Keyboard

I’ve played with the idea of re-using USB devices as Ableton Live controllers in the past; check out my custom USB QWERTY keyboard as an example. This time around, I thought I’d take advantage of the wireless connection of the number pad and also do some proper soldering and re-housing to make this project even cooler. As a result, this is part one of this project. I hope to have part 2 completed in a few weeks (I have a special 2-part “52 things” set of projects coming up that will delay it a bit).

My eventual plan is that this will become a thin 4-button controller for Ableton Live; something that can sit right in front of my Line 6 Pod XT Live guitar interface. I am toying around with the idea of using the NUM LOCK key to create the ability to have 2 banks of buttons in one, but that will get explored in the prototyping stage.

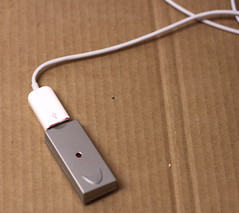
I began by looking at what I was working with. As it turns out, the wireless USB receiver for the number pad is too bulky to allow another USB device to be plugged into the laptop at the same time, so I decided to hack an old Apple USB keyboard extension so it would work.

IMG_0640

The Apple USB keyboard extenders have a little nub inside them to prevent them being used for anything besides a keyboard, but a little work with the Dremel cutoff wheel and a pair of pliers got rid of the extra plastic and the nub.

IMG_0645IMG_0647

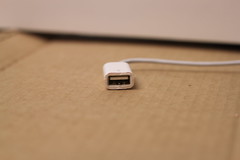
Now the receiver fits just fine on the end of it.
IMG_0650

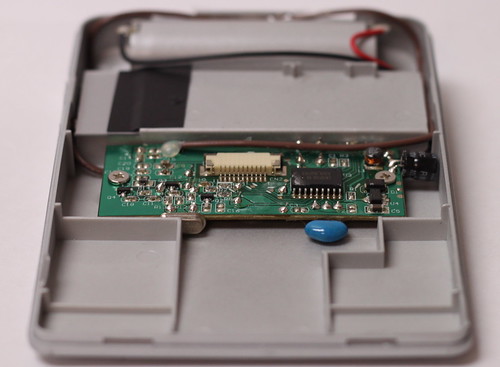
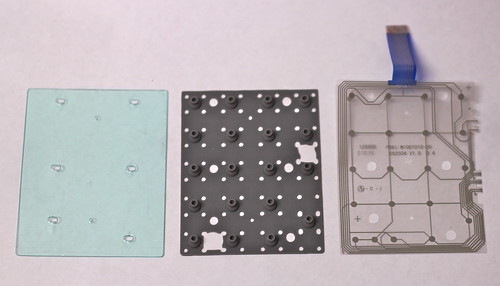
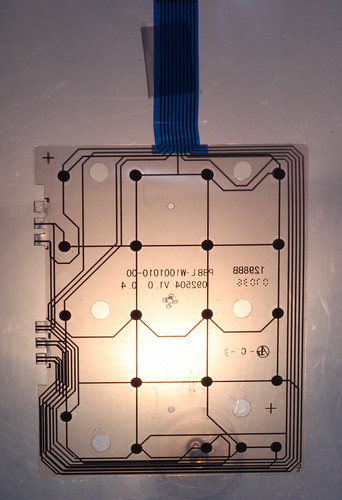
After getting that squared away, I began disassembling the keypad. Here are some photos from that process; you can check out the complete set of disassembly photos on Flickr.

IMG_0662

IMG_0676

IMG_0708

I’m planning on housing it in a custom steel stud enclosure, as shown on this site:

Steel Studs and the $0.25 Effect Enclosure

That’s all for this week. As mentioned, the remainder of this project will be delayed a bit, as I’m going to be doing a special 2-part set of 52 things projects for weeks 12 and 13.

6/52: smoke photos + new DIY collapsible softbox

This week, I worked on two photography projects for 52 things: smoke photos, and a new DIY softbox for one of my flashes.

Part 1: smoke photos

smoke: blue on black

After I made my new macro photo box, I started thinking about projects that it would work well for. I’ve done some water photos before (though none that I really loved), but what captured my imagination this week was the idea of photographing smoke.

I set up the macro box, put my Vivitar 283 flash on a boom stand, set my camera up on the tripod, and got out a stick of incense. After taking a few shots, I soon realized that the pure white background of the macro box was not working at all – the smoke just didn’t show up against the white at all. I then tried a black background – here’s an example:

smoke photo (attempt 1 example)

After not much success with that, I decided to see how others had approached this subject matter, and found an excellent article on the subject:

http://www.sensitivelight.com/smoke2/

I realized that I was letting far too much light from my flash onto the black background, and as a result it was washing it out. I adjusted the box so the flash was completely flagged off from the background. Here’s what it looks like (the lighter is there so I could focus on it – autofocus is useless with smoke, so I used it to set focus, then shifted over slightly so it was out of the frame).

smoke photos: setup (detail)

Once I popped a test shot, my jaw dropped.

smoke: blue on black

I shot a number of smoke pictures, and with only a little cleanup in Photoshop, I was completely happy with the results.

View the complete set of smoke photos via Flickr.

Part 2: collapsible DIY softbox for Vivitar 283 flash

I also started thinking about my softbox situation. I made a small DIY softbox for the Vivitar 283 a while back, but it had two distinct disadvantages: it wasn’t very easy to stick in a bag, and the front diffuser material was tissue paper, which is quite delicate. I therefore decided to solve both of those problems with a new, slightly larger softbox that would fold up for transport.

As a technology teacher, I made myself sit down and think about this as a design problem, sketching out some requirements and a 3-view drawing.

DIY collapsible softbox

Once my design was set, I got out materials and started construction.

DIY collapsible softbox

It’s not quite done yet, as I have yet to finalize the front diffuser panel, but I have some white shower curtain material that I think is going to work great. Once it’s finished I should be able to use it quite a bit since it will fit in my laptop bag, making it easily portable.

DIY collapsible softbox

View the complete set of DIY softbox photos via Flickr.

Goodbye, old Powerbook. Hello, Intel MacBook!

Well, it finally happened: the faithful Apple Powerbook that I’d been using for 4 1/2 years finally died last week. It took me through countless gigs, travelled with me all over the US and Canada, and was my main tool for all of my artistic output.

Now that it’s dead (bad motherboard, I think), I’ll be selling off some of the components and software on eBay (links to come) in order to help pay for the new computer I’ve ordered. I’ve got a shiny new MacBook (2.16GHz, white) coming from Apple, and it should be here by early next week.

I thought I’d use this entry to keep track of how the transition from my old PPC-based Powerbook to the new Intel-based MacBook goes.

Things I know already:

  • The MIDI interface I use in my controller rig (a Roland MPU64) probably won’t work any more, since there aren’t Universal Binary drivers for it, so it will probably have to get eBay’d and replaced with a newer interface. It’s a shame – I always had great success with that interface, and designed the controller rig partially to fit that box specifically. Ah well.
  • I won’t be able to use my trusty Emagic EVP73 electric piano plugin any more, nor will I be able to use the MDA e-Piano VST plugin. There go my Rhodes sounds! I’m still not sure how I’ll be replacing them – my music partner J. Schnable and I have been talking through some options, and we’ll figure something out, starting with trying out a SoundFont Rhodes set. I’ll have the GarageBand electric pianos, and the same instruments available once I upgrade Logic Express to version 7 so I can use it on the MacBook. I wish the available Rhodes plugins weren’t so pricey – Native Instruments’ Elektrik Piano is $199, Tassman’s Lounge Lizard is $225, etc.
  • I’m going to have to upgrade my copy of Logic Express, as mentioned above. I use Ableton Live for probably 75% of my music production these days, but Logic is still far superior in my mind for arrangements and linear, song-based production, and I have a ton of projects that are unfinished in Logic. I’m currently running Logic Express 6, and will have to spend the $100 or so to upgrade it to Logic Express 7, which is the Intel-compatible Universal Binary version. Happily, upgrading it gives me the ability to use Apple Loops, as well as the excellent GarageBand instruments, so it’s worth it.
  • Lots more software isn’t compatible, though we’ll see how well some of it runs under Rosetta (the PPC emulator used by Intel macs). Hopefully my Palm Desktop software that I use to manage my calendar and sync with my Palm Zire will still work OK.
  • Once I get the new computer in, I’ll update this entry or post a new one, describing what works, what doesn’t, and what’s different. I’m looking forward to it!