13/52: Charlotte Photos, Part 2

As mentioned in last week’s post, I recently spent some time in Charlotte, NC. I was thrilled to be able to spend some time hanging with my friend Kyle Tait (who’s making some music again after a long break). I’d planned on using our time together to do a long photowalk around Charlotte, taking tons of pictures, but as it turned out our conversation and catchup was more important and interesting. Life happens that way sometime, and I wouldn’t change how I spent that time at all.

However, I did still manage to snap some additional Charlotte pictures after last week’s post. I was in Charlotte for the International Technology and Engineering Educator’s Association conference (photos at my personal Flickr stream), and the majority of the conference was held at the Charlotte Convention Center.

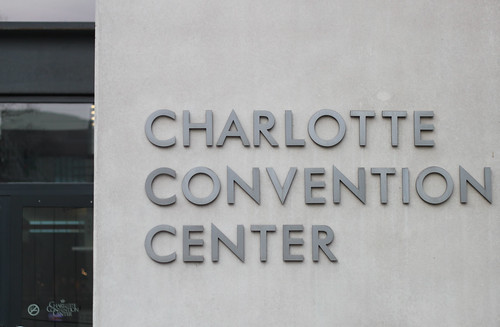
13/52: Charlotte Convention Center

On Saturday, I was able to slip away from the fast-paced conference sessions for a few minute, and I snapped some shots of the Charlotte Convention Center’s architectural details. Architectural work has been a long-time focus of my photography work, and I was thrilled to walk into the Convention Center the first day and see all the great typography and architectural details. For example, the signage was all set in Futura, one of my favorite typefaces.

13/52: Charlotte Convention Center

This week’s project, then, is a small set of what I captured and saw at the Charlotte Convention Center.

12/52: Charlotte Photos, Part 1

I always enjoy being in a new city and getting a chance to explore it. Taking photos is one way I do that, and this week’s 52 things project is a set of photos from Charlotte.

Finally: at the risk of making a shameless plug, I took the majority of these on Thursday night while listening to Joshua Schnable’s “Live at FFMUP” live set from the chromedecay live 2009 release:

It made for excellent urban exploration music.

11/52: DIY USB foot controller, part 1

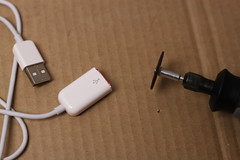
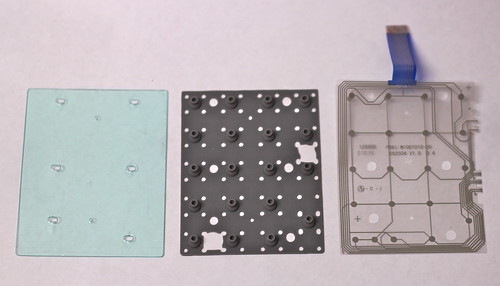
For this week’s project, I decided to turn an old wireless USB number pad into a foot controller for Ableton Live. Here’s what I started with:

IMG_0654

I was partially inspired to take on this project after seeing this thread on Create Digital Music last year:

Sexy DIY Footswitch for Music, Using the Brain of a USB QWERTY Keyboard

I’ve played with the idea of re-using USB devices as Ableton Live controllers in the past; check out my custom USB QWERTY keyboard as an example. This time around, I thought I’d take advantage of the wireless connection of the number pad and also do some proper soldering and re-housing to make this project even cooler. As a result, this is part one of this project. I hope to have part 2 completed in a few weeks (I have a special 2-part “52 things” set of projects coming up that will delay it a bit).

My eventual plan is that this will become a thin 4-button controller for Ableton Live; something that can sit right in front of my Line 6 Pod XT Live guitar interface. I am toying around with the idea of using the NUM LOCK key to create the ability to have 2 banks of buttons in one, but that will get explored in the prototyping stage.

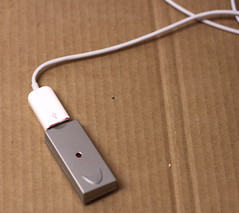
I began by looking at what I was working with. As it turns out, the wireless USB receiver for the number pad is too bulky to allow another USB device to be plugged into the laptop at the same time, so I decided to hack an old Apple USB keyboard extension so it would work.

IMG_0640

The Apple USB keyboard extenders have a little nub inside them to prevent them being used for anything besides a keyboard, but a little work with the Dremel cutoff wheel and a pair of pliers got rid of the extra plastic and the nub.

IMG_0645IMG_0647

Now the receiver fits just fine on the end of it.
IMG_0650

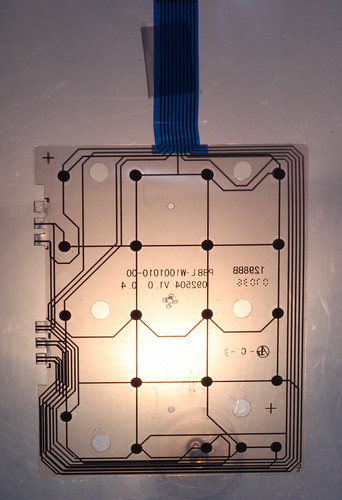
After getting that squared away, I began disassembling the keypad. Here are some photos from that process; you can check out the complete set of disassembly photos on Flickr.

IMG_0662

IMG_0676

IMG_0708

I’m planning on housing it in a custom steel stud enclosure, as shown on this site:

Steel Studs and the $0.25 Effect Enclosure

That’s all for this week. As mentioned, the remainder of this project will be delayed a bit, as I’m going to be doing a special 2-part set of 52 things projects for weeks 12 and 13.

10/52: new live recording – chromedecay live 2009

I’m pleased to announce the newest chromedecay release, “chromedecay live 2009“. This release features live performances from Bill Van Loo and Joshua Schnable.

Each of these sets was recorded in late 2009. Bill Van Loo’s set was recorded at the Dreamland Theater in Ypsilanti, MI, and Joshua Schnable’s was recorded at FFMUP in Princeton, NY.

This release is available for purchase via iTunes, Amazon and other digital distribution sites. Check the release page for more details.

Joshua’s live set was recorded on October 12, 2009. It is a collection of new work; a tribute to the Berlin dub techno movement of the mid-1990s.

My live set was essentially a live performance of the Ypsilanti by Night record, with lots of live tweaks and additions, along with a rare performance of my track “FM Study”. You can view video from the first song of my live set below:

Bill Van Loo performs “Ypsilanti by Night” live at the Dreamland Theater from chromedecay on Vimeo.

See also: chromedecay behind the scenes: bill van loo live performance rig, part 1 and part 2, where the gear and methods used to perform my part of this recording are discussed in great detail.

9/52: chromedecay 2010 sampler CD

This week’s 52 things project is the 2010 chromedecay sampler CD. It comes in a handmade cardstock sleeve with one of 5 original photos, and contains a selection of new music by chromedecay artists. It’s $3 plus shipping, or free with the purchase of any full-length release (while supplies last). Read more about this project below.

9/52: chromedecay 2010 label sampler

I often start working on a project idea for 52 things a number of weeks before it’s completed and ready to show here on the site. This week’s project is an example of that type of pre-planning.

I’d been thinking about putting together a sampler CD that would contain new music from chromedecay artists for 2010. It’s important to me that chromedecay releases be unique in some way. The obvious trend has been toward digital-only releases, so I felt the unique quality for this CD sampler would be to emphasize the visual and handmade aspects of it.

I got an email from Snapfish at the beginning of the year, advertising 50 prints for 50 cents (plus shipping costs). I started thinking about what I could do with 50 prints, and realized they’d make great cover art for a small CD-R release.

I then started going through my iPhoto library, looking for photos that would make good covers. I settled on using these 5 photos, with 10 copies of each, for a total of 50 prints:
P1160839_23785815708_be0c43f014_oP1110426-EDITEDP1110385_2P1090927_2

The prints were 4×6 inches, so I uploaded versions that had a 2″ strip of black to one side in order to produce a final image that was 4×4 inches square. After they arrived, I spent 15 minutes or so cutting off the black strip to produce a final 4×4 square image:
Starting to assemble the covers Cutting the 4x6 prints down to size

After a bit of work, I had all 5 sets of cover photos cut down to size:
the completed 4x4 prints

I then set the cover photos aside, waiting for the right time to complete the assembly of the covers. This week, I spent some time in Photoshop creating the overall cover layout, including placement for the cover photo.

I also used the time between the first of the year and now to solicit new material from some of the chromedecay artists. I got great material from both Joshua Schnable and Rob Theakston, longtime contributors to the label. The final tracklist ended up being this:

  1. Cultivating – Rob Theakston
  2. 1970 Sumeria – Joshua Schnable
  3. 11-14-2009 – Bill Van Loo
  4. 5/52 (Rhodes & Reaktor) – Bill Van Loo
  5. 1970 Sumeria (Bill Van Loo’s JPL remix) – Joshua Schnable
  6. Vostok Station – Joshua Schnable
  7. Overextended – Rob Theakston
  8. The End of It – Bill Van Loo
  9. Dust Bred – Bill Van Loo

After finishing the layout for the CD sleeve, it was time to print, cut, fold, and glue. Here’s a short video describing that process:

9/52: chromedecay 2010 label sampler CD behind-the-scenes from chromedecay on Vimeo.

You can see more photos of the whole process below:

9/52: 2010 chromedecay sampler photos on Flickr

I’m very pleased to announce that these are now available. As mentioned above, it’s $3 plus shipping, or free with the purchase of any full-length release while supplies last.

8/52: Bill Van Loo “The Ghost of an Idea” now available digitally

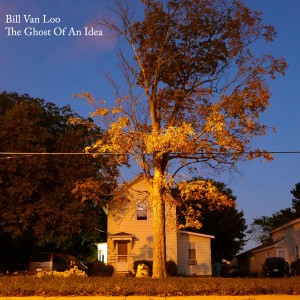
I’m pleased to announce that a 4-track EP of my ambient guitar work entitled “The Ghost of an Idea” is now available for purchase digitally. This week’s project was getting a page built for it on the chromedecay site, and organizing all the other stuff associated with publicizing the record’s digital release.

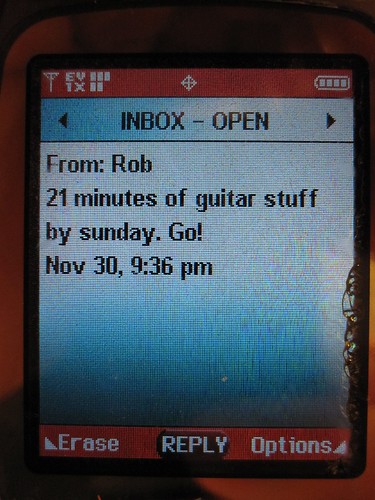
This record came together at the beginning of December 2009, when my longtime friend and musical collaborator Rob Theakson sent me the following text message:

The fateful text...

That was on a Monday night, giving me 6 days to produce 21 minutes of music. Now, if this had been anybody but Rob, I would probably have laughed at the idea, and given it no further thought. However, Rob is one of my best friends (as previously mentioned) and he has a way of convincing me that crazy ideas are actually good ones.

I found myself staying late at my church on Tuesday of that week and recording a bunch of guitar improvisations after band practice ended. I had a very loose idea of what it should sound like, along with a rough conceptural framework to hang it on.

The title of the record, “The Ghost of an Idea”, is taken from the prologue of Charles Dickens’ classic “A Christmas Carol”; the four track titles are abbreviated forms of chapter titles. As I started thinking about the story and how it’s structured, I was inspired by the complex and emotional memories in it, as well as the idea of the Holy Ghost inhabiting and inspiring artistic works of diverse forms.

That gave me just enough to go on. I took a guitar piece I’d previously recorded for Rob but which had never been released, and that became “The First”. The other 3 pieces were based on these guitar improvisations, which were edited and layered in Logic Audio (much like “6 strings for a winter’s day“, my earlier ambient guitar work).

The cover image is a photo of a house in Ypsilanti that I took last summer:
Ypsilanti house

Once I delivered the final mixes to Rob, he quickly pressed up 50 copies of the record as a 3″ CD, which is one format that his boutique label releases music on. A number of copies made their way to me, and I sold the majority to recipients of my email list in the following week or so. I have a few left to sell at shows, but that’s it, so I realized it made sense to also offer this digitally.

After looking into my options, I found that RouteNote seemed to make the most sense for this release. Its major difference from other digital distribution companies like CDBaby (who I use for most of my digital distribution, especially for releases that are also available as physical CDs) is that RouteNote doesn’t charge a fee upfront, but instead takes a slightly larger percentage of each MP3 sold. For a release with such a small number of tracks, it would take quite a bit of sales to recoup even the $55 setup fee that CDBaby charges, so it seemed to make sense.

I’m very please that this is now available; RouteNote has distributed it to the Amazon MP3 Store and eMusic. It will be available via iTunes very soon.

You can also check out the growing selection of other releases on chromedecay, both by me and others.

7/52: Bill Van Loo remix of Joshua Schnable’s “1970 Sumeria”

Earlier this week, chromedecay artist Joshua Schnable created a new track, and he gave me access to the stems in order to remix it.

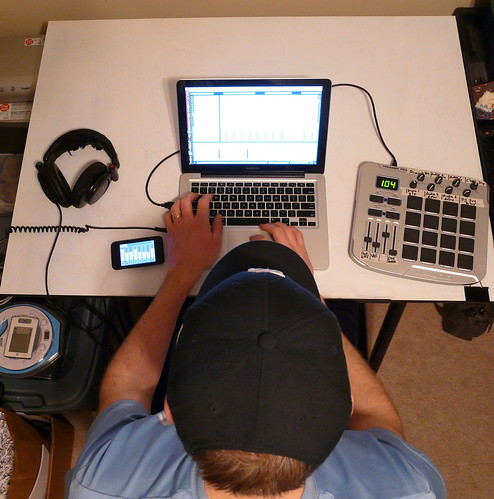
Bill Van Loo remixing Joshua Schnable's "1970 Sumeria"

Here’s Joshua’s original “1970 Sumeria”, on SoundCloud:

1970 sumeria by jschnable

I got the stems downloaded and started work on my remix, using a very minimal setup – just the laptop running Ableton Live 7, my M-Audio Trigger Finger, and my headphones. This allowed me to start work in my wife’s art studio-slash-home office while she was doing other things.

Bill Van Loo remixing Joshua Schnable's "1970 Sumeria"

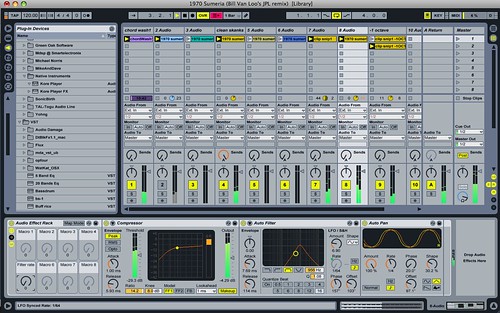
Here’s a screenshot of Ableton Live partway through work on the remix:

Ableton Live screenshot of Bill Van Loo remix of Joshua Schnable's "1970 Sumeria"

I finished the remix in the actual chromedecay studio today, and now it’s available for you to listen to via SoundCloud:

1970 Sumeria (Bill Van Loo’s ambient JPL remix) by billvanloo

6/52: smoke photos + new DIY collapsible softbox

This week, I worked on two photography projects for 52 things: smoke photos, and a new DIY softbox for one of my flashes.

Part 1: smoke photos

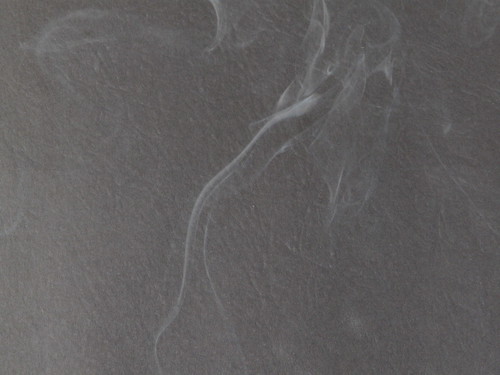
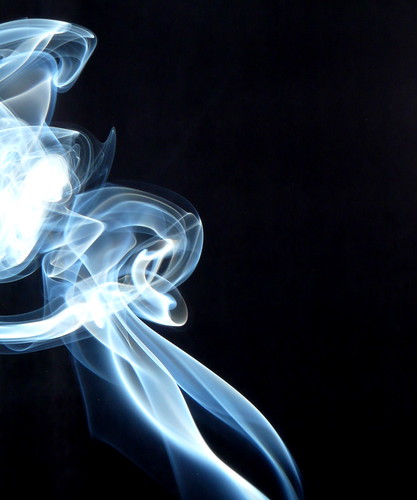
smoke: blue on black

After I made my new macro photo box, I started thinking about projects that it would work well for. I’ve done some water photos before (though none that I really loved), but what captured my imagination this week was the idea of photographing smoke.

I set up the macro box, put my Vivitar 283 flash on a boom stand, set my camera up on the tripod, and got out a stick of incense. After taking a few shots, I soon realized that the pure white background of the macro box was not working at all – the smoke just didn’t show up against the white at all. I then tried a black background – here’s an example:

smoke photo (attempt 1 example)

After not much success with that, I decided to see how others had approached this subject matter, and found an excellent article on the subject:

http://www.sensitivelight.com/smoke2/

I realized that I was letting far too much light from my flash onto the black background, and as a result it was washing it out. I adjusted the box so the flash was completely flagged off from the background. Here’s what it looks like (the lighter is there so I could focus on it – autofocus is useless with smoke, so I used it to set focus, then shifted over slightly so it was out of the frame).

smoke photos: setup (detail)

Once I popped a test shot, my jaw dropped.

smoke: blue on black

I shot a number of smoke pictures, and with only a little cleanup in Photoshop, I was completely happy with the results.

View the complete set of smoke photos via Flickr.

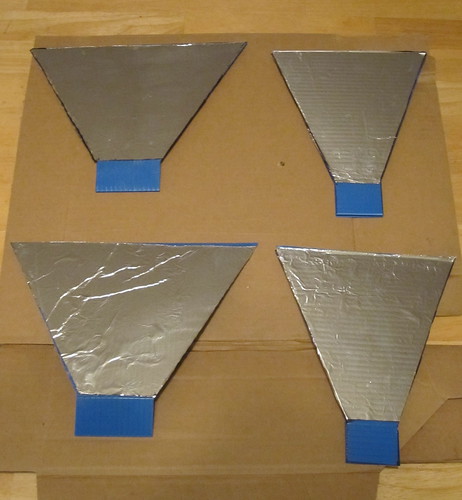
Part 2: collapsible DIY softbox for Vivitar 283 flash

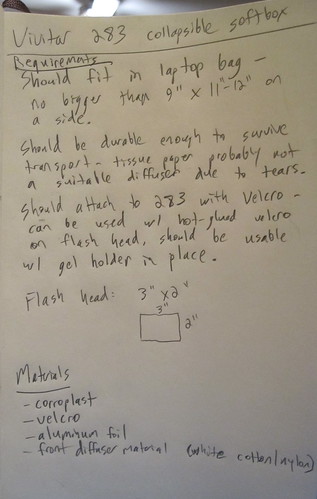
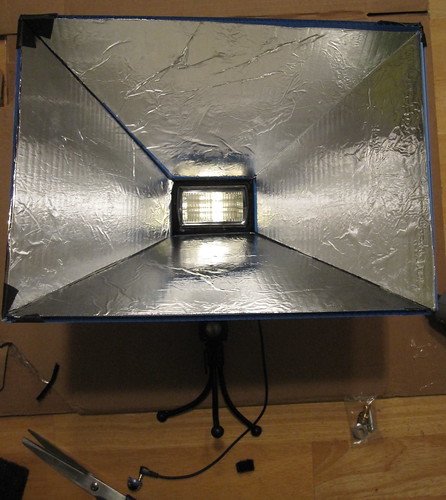
I also started thinking about my softbox situation. I made a small DIY softbox for the Vivitar 283 a while back, but it had two distinct disadvantages: it wasn’t very easy to stick in a bag, and the front diffuser material was tissue paper, which is quite delicate. I therefore decided to solve both of those problems with a new, slightly larger softbox that would fold up for transport.

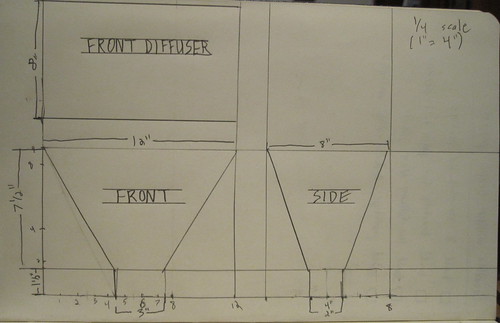
As a technology teacher, I made myself sit down and think about this as a design problem, sketching out some requirements and a 3-view drawing.

DIY collapsible softbox

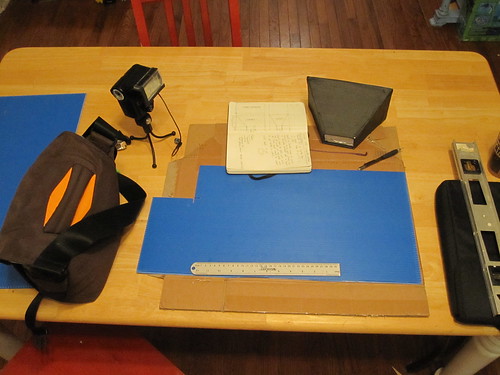
Once my design was set, I got out materials and started construction.

DIY collapsible softbox

It’s not quite done yet, as I have yet to finalize the front diffuser panel, but I have some white shower curtain material that I think is going to work great. Once it’s finished I should be able to use it quite a bit since it will fit in my laptop bag, making it easily portable.

DIY collapsible softbox

View the complete set of DIY softbox photos via Flickr.

5/52: iBook instrument station

This week, I spent some time setting up a new instrument station in the chromedecay studio.

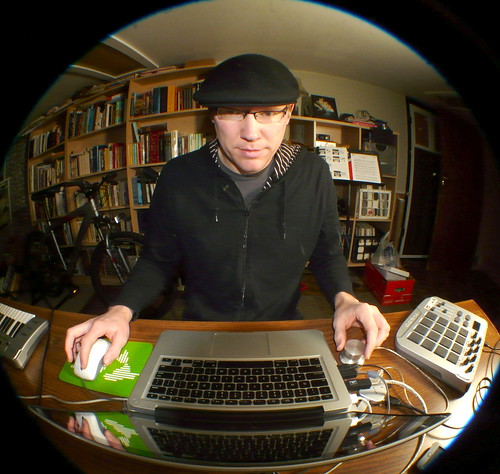
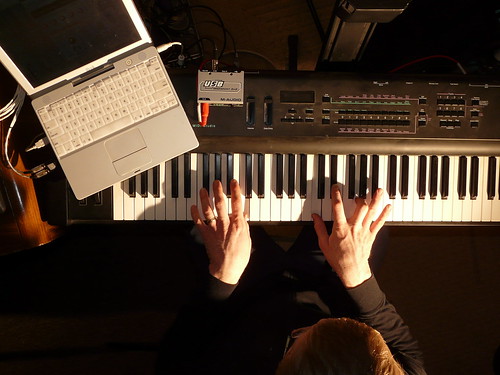
5/52: iBook & Reaktor/Logic instrument station

A few years ago, I replaced my trusty titanium PowerBook with a shiny new Intel MacBook. That brought lots of increased power, but as I mentioned in the post at the time, it meant losing some things I really liked as a result of moving from the PowerPC-based PowerBook to the Intel-based MacBook. My favorite Rhodes electric piano sound came from Logic’s EVP73 plugin, which didn’t run on Intel Macs. One of my other favorite sound sources was Reaktor Session, which I loved for its Vierring ensemble, among others.

logic: evp73 screenshot
reaktor: vierring screenshot

This week’s project, then, was getting an old 500MHz iBook set up to restore that lost functionality! I realized that I could install my old Logic Audio 6 on the iBook and set up EVP73 and Reaktor Session running inside it as AudioUnits plugins. I only get a couple instruments at a time, but that’s perfect – I’m still running Live 7 and Logic 7 on my MacBook Pro, and the audio from the iBook just gets routed straight into that.

Getting Logic installed and set up was a breeze – this is one place where having dongle-based copy protection makes this much easier than a networked challenge/response or authorization. I just plugged in my old Logic dongle, installed the program off CD, and I was up and running. Getting Reaktor Session going was a little more work – it uses a network-based authorization scheme, and I had to email Native Instruments support to get it authorized (to their credit, they turned it around in a day or two and it was quite simple after that).

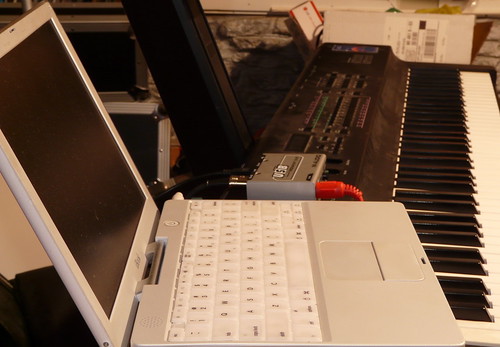
What I now have is an instrument station that consists of the iBook running Logic 6 with EVP73, Reaktor Session, and any other native Logic instruments I care to load up. It’s got a little 2-in/2-out MIDI interface connected over USB (thanks again, Kent!), which lets me connect my 76-key controller keyboard, as well as MIDI clock sync from the MacBook Pro rig. I can sit down at the keyboard, pull up a great Rhodes sound on the EVP73, and just play. That’s what I was really missing – the chance to just play, without having to worry about routing, plugins, compatibility, and so on.

Here’s a quick jam I recorded last night. The electric piano sound comes from EVP73, the synth sounds are from Reaktor Session’s Vierring ensemble, and the drums are being programmed in Live with a Drum Rack I built.

[audio:https://www.chromedecay.org/wp-content/uploads/2010/01/5_52_-rhodes-+-reaktor-session-jam.mp3|titles=5/52: rhodes + reaktor session jam]
download this audio track: 5/52: rhodes + reaktor session jam

A few detail photos:

5/52: iBook + 76 keys

5/52: iBook snake detail

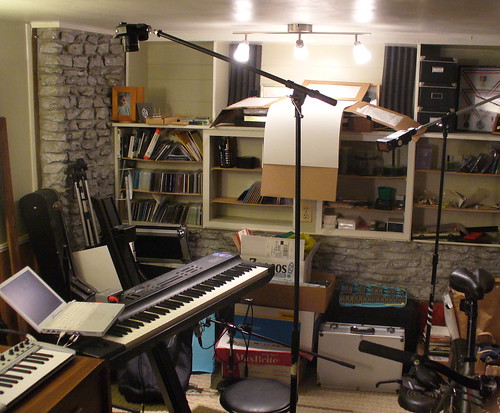
Finally, if you’re interested, here’s a setup shot, showing how I took the self-portrait that’s at the top of this post:
5/52: setup shot for Bill Van Loo iBook instrument station portrait

The camera for the shot (a Panasonic Lumix DMC-FZ18) is on a microphone boom stand, angled down using a Manfrotto mini ball head. The main light for the portrait is a Vivitar 283 with a 1/2 CTO gel (shown at the right of the photo), also on a microphone boom stand.

Also, you can see that the far end of the studio there is a bit of a mess. That’s another kind of project, though…

4/52 – new Strobist macro lightbox plus DIY photography gear roundup

A few years ago, I saw an article on the excellent Strobist site, describing how you could build a cheap, easy macro studio in a box – the $10 Macro Photo Studio. I went ahead and built one, and it looked like this:
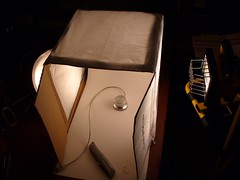
new Strobist $10 macro lightbox

It was quite decent, but unfortunately got destroyed because it was too delicate and I never had a good place to store it (where do you stick a big, delicate box that’s mostly comprised of tissue paper?).

I therefore decided to build a new one for this week’s 52 things entry, making a few modifications along the way. I used the same idea as the original Strobist article, but made a few important changes. First off, I decided it would have to be collapsible, to prevent the issue I’d run into with the first one. As you can see below, this is what it looks like when unfolded:
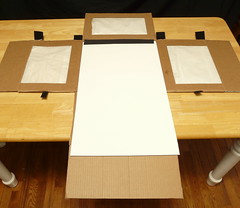
new Macro lightbox: unfolded

The sides are held together at the top and bottom with Velcro strips that allow it to be quickly assembled or broken down:
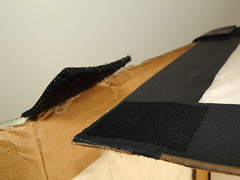
new Macro lightbox: corner detail

Here’s what it looks like all assembled:
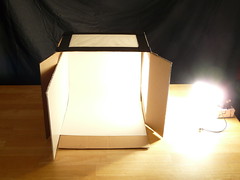
new Macro lightbox: setup shot

I shot a number of test shots using two flashes: a Sunpak 322s on one side, and a Vivitar 283 on the other side, and got excellent diffused light with minimal shadows, like this one of my son’s Bionicle invention (he’s got a bunch of Bionicles made to his own designs, using parts from the kits he has; check out his own site to see more of what he’s up to):
Macro lightbox test: Bionicle

Unfortunately, the Sunpak died right at the end of my first test session, and I’m not sure why (it seems to get a charge, but the flash never fires). That means I’m down to one flash, the Vivitar 283. It works well enough, though, as you can see from today’s photos.

I decided to use this as a chance to do a roundup of some of the DIY photo gear I’ve made over the past year or two.

This is a DIY mic stand to tripod stud adapter. I have a number of mic stands in my studio, including a couple boom stands, but only one tripod. That makes it difficult to place my flash, cameras, etc depending on the situation (for my recent chromedecay behind the scenes video, for example, I used an overhead camera shooting down, mounted on a boom stand with this adapter).

Macro lightbox test: DIY microphone stand to tripod stud adapter

It’s just a metal stud that came with my mic stands, drilled out to allow a 1/4 x 20 bolt (the standard for tripod-mounted camera gear) to be passed through. A wing nut and washer allow it to be tightened onto whatever it’s holding.

I love these cheap clamps from Home Depot, and when you take the cushion off one of the arms, there’s a perfect spot to pass a 1/4 x 20 bolt through. That means it can be used either as a clamped tripod mount, or as a clamp on the end of a mic stand.
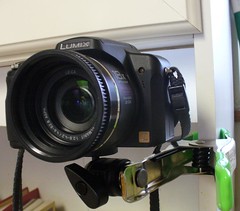
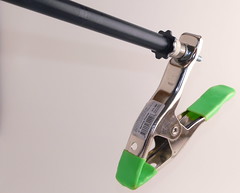
Panasonic Lumix DMC-FZ18 on DIY superclamp

Macro lightbox test: DIY boom clamp

Finally, here’s a homemade diffuser (the “salsa bottle diffuser”) whose origins you can easily guess:
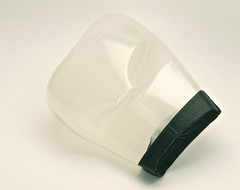
Macro lightbox test: DIY diffuser

It slips over the end of the Vivitar and diffuses the light nicely.
Check out my Flickr set for more photos of the new Macro lightbox in action, and more DIY photo/video gear.