28/52: new billvanloo.com

For this week’s project, I decided to give my personal online presence a complete refresh, in order to pursue some new opportunities. I’ve maintained billvanloo.com for many years in order to have an online presence for the other things I do besides running chromedecay. This week, it got a total overhaul and refresh.

billvanloo.com splash page screenshot

The first part of this refresh involved upgrading to WordPress 3.0. I had been running WordPress 2.9 for quite some time, and was excited to hear that 3.0 had been released. It is a great new release, and upgrading was quite simple. The automated upgrade process ran smoothly, and before long, I was happily running WordPress 3.0.

The next step was moving all of my static content into WordPress, taking advantage of its Pages capability. As with chromedecay (before its own refresh at the beginning of this year), I had been using my own custom PHP-and-HTML solution for maintaining static pages, but I was eager to move all of this into WordPress in order to make content maintenance easier to do.

At the moment, I’m using the new twentyten theme that comes with WordPress. I did some modifications to the theme, like tweaking the CSS and suppressing the title on the front page, but for the most part it works great right out of the box.

One of the biggest reasons I wanted to refresh the site was to focus on my burgeoning photography pursuit. I’ve had some successful photoshoots over the past few months, and I have several more lined up in the future, including my first paid work. I needed a way to showcase my photography and show a focused portfolio.

After a quick look at PhotoShelter, I decided on using the NexGEN Gallery WordPress plugin to power my photography section. It has a pretty nice administration interface for uploading photos, and includes an elegant lightbox-style popup for viewing photos full-size.

One thing I realized I needed to do was start watermarking my photos, so I wrote a quick Photoshop action to open a file, add the watermark, add a 10-pixel black frame, and resize it. I can now point that action at a batch of files and have it automatically produce resized & watermarked images, ready for upload to the site.

I also started a Twitter account specifically for my photography pursuits. You can follow me @billvanloophoto. This is my first foray into Twitter, so having it limited to a focused aspect of my work is nice. My plan is to use it to follow photographers I like, post interesting links to my own work and that of others, and (once I start getting more clients & paid work), offering promotional offers.

I’m excited to launch this new chapter of my story as an artist!

announcing CTRL4 + CTRL8: MIDI Control for Griffin PowerMate + PureData

Joshua Schnable has been working on a new controller idea, and chromedecay is proud to announce its availability.

CTRL4 & CTRL8: MIDI Control for the Griffin PowerMate + PureData lets you turn a Griffin Powermate into a flexible MIDI controller. The video below gives a very brief introduction to how this software works:

FIRST LOOK: Joshua Schnable’s CTRL8 Powermate/PD control software from chromedecay on Vimeo.

In short, this setup allows you to use a Griffin PowerMate (the aluminum knob that glows blue and outputs keystrokes/key commands) with the free, open-source PureData software in order to turn it into a 4- or 8-channel MIDI knob controller. More detailed videos will be coming soon, or you can check out the manual for more information.

Intel MacBook: setup and first impressions

As promised in my last post (“Goodbye old Powerbook, Hello Intel MacBook!“), here are some further thoughts about the transition to my new laptop.

First off, my new MacBook arrived much earlier than I expected. I paid for 2-3 day shipping, and it arrived in two days, even though the FedEx tracking page said it came from Shanghai, China. Nice! It was quite a pleasant surprise to be awakened by the doorbell, with a cheerful FedEx delivery guy waiting to hand me a box containing the MacBook.

As expected, taking the new laptop out of its box was a joy. As countless people have said, nobody beats Apple at the unboxing experience, and this new laptop was no exception. I love the molded styrofoam inserts that have the word “MacBook” engraved in them. Think about that statement for a second – I just expressed affection for a piece of styrofoam. Now that’s identity design, and stirring up passion from the audience!

MacBook - Styrofoam packaging

Once I got the new MacBook booted up and running, the next chore was starting to get all my data moved over, and all the programs I use installed. This was a pretty big task, since I had at least 20 different programs to install, and 25 GB of data to move over from various backups. On top of that, I decided that I’d finally consolidate my iPhoto library onto one machine instead of having it split across multiple CD and DVD backups – the new MacBook’s 120GB drive made that really easy. Many hours of importing photos later, I have about 5500 digital photos to sort out, label, and organize, but that’s 7 years worth of history – all 3 of my kids growing up, countless gigs, and all my more art-oriented photography. It’s going to be great to have it all in one place.

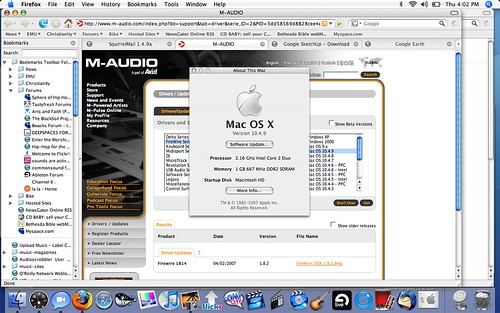
setting up the new MacBook

On to the software installation. There were really no big surprises here – I just kept plugging away at downloading the latest Universal Binary versions of the software I use from the Web, running installers, and so on. I don’t think I even had to restart more than once – the Cycling74 software SoundFlower required a reboot, but everything else just proceeded along smoothly.

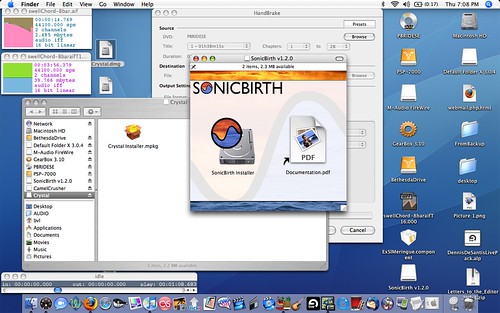
MacBook setup, continued

Here’s a partial list of everything I installed at first:

  • Ableton Live 6.07 (my main music production tool these days
  • SoundHack (again, not Universal Binary, but still blazing fast on the Intel Mac
  • Reason 2.5 Adapted (an old version; trying to see if it’s worth keeping for the electric piano sounds
  • SonicBirth (a great audio programming environment – lets you create AudioUnits plugins, for free!
  • Thunderbird (my e-mail client of choice
  • QuartzComposer (from the Developer tools CD that came with the MacBook – a fantastic free visual programming environment
  • Last.fm (for social music listening/charting
  • Flickr Uploadr (the fastest way to upload images to Flickr from iPhoto
  • Photoshop Elements 3.0 (it’s going to be running under Rosetta, since it’s not Universal Binary, but still at least as fast as running it on the old 867MHz PowerBook!
  • ComicLife (a great, whimsical app. I’ll be using it for a class I teach this summer.
  • iSquint (for converting videos to iPod format
  • Handbrake (for ripping DVDs to the hard drive
  • Palm Desktop (for keeping track of my calendar
  • NeoOffice (the free Microsoft Office alternative – runs MUCH faster and smoother on this machine than on the old PowerBook!
  • Bitpim (trying it out to see if it works with my new Bluetooth-compatible phone
  • TextWrangler (for building Web sites
  • Firefox (for Web browsing
  • Fugu (my SCP/SFTP client of choice

So, that’s a lot of software! On top of that, I had to reorganize all my music files. On the Powerbook, I had my hard drive split into two partitions, one for my operating system, documents, and applications, and the other for music stuff. On this new computer, I decided not to mess with partitioning the drive, and just kept it as one big partion, so what had been an “Audio” partition now is an “AUDIO” folder in the root of my hard drive. I think it should work fine, but it does mean some tedious work in locating samples inside Ableton Live, and so on. Ah well.

As far as my music software goes, I’ve really only played with Ableton Live so far. Acting on a tip from J. Schnable, I downloaded the Bismark BS-1 SoundFont player, and the jRhodes3 SoundFont set, and it sounds great! I think I’ve found my new Rhodes electric piano sound, which is nice since that’s a core part of my signature sound.

Things I still have left: I realized today that I hadn’t gotten my e-mail backed up from the old laptop’s hard drive, so I had to order a new external hard drive enclosure that fits 2.5″ laptop drives, which I’ll put the old hard drive into and use to pull over all my old data. Everything else had made it onto the FireWire drive I used for backing it up, but somehow, I missed the e-mail. Ah well – at least I have it!

That’s about it for now – thanks for reading! If you read this and want to help me pay for the new laptop, order any CD from the chromedecay catalog and I’ll waive or refund the shipping charge.

adventures in spray paint, plywood and velcro: my new controller board

Lately, I’ve had a problem. When I started out playing live electronic music, I quickly realized the value of rack-mounted gear, in terms of making setting up for a show quicker and easier. In the last few years, however, I’ve moved away from rack-mounted gear in favor of using laptop-based software combined with hardware controllers – things I can put my hands on during a show. However, I still wanted the quick and easy setup that I got when I carried a rack of gear. The ideal is that I’d get to a gig, pop off a cover, plug a few things in, and be ready to go.

The reality the last few years, however, has been that I’d take out four or five pieces, plug in all their respective cables (power, audio, MIDI, USB, etc) and carefully assemble this network of stuff. At the end of the night, I’d tear it all down again. Since all the pieces were things I needed to have my hands on, they don’t lend themselves well to being mounted in a rack, so after doing some thinking and experimenting, I came up with the idea of creating a controller board, in the spirit of the pedalboard a guitarist might use (as a side note, I’ve only recently stopped carrying a pedalboard in favor of my Line 6 PodXT Live, which does it all in one tidy box).

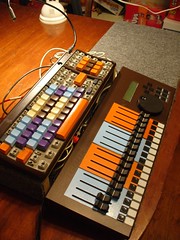
The design I came up with consolidates my reworked USB QWERTY keyboard, my repainted PC1600x MIDI fader box, a USB hub, and a 4-channel MIDI interface, and requires only plugging in a few cables after taking it out of the case. The photos below document the process.

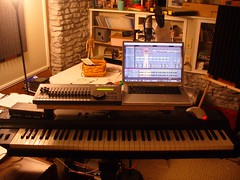
Initially, my thought was that I’d simply create a folding shelf that would fit into my laptop bag, and save the trouble of carrying a big, long shelf to set on an X-stand or my Deltex stand. You can see what my rig looked like with that shelf in place below:

live rig

However, I quickly realized that the folding shelf by itself didn’t save me any time in setting up, so I kept thinking about it. I realized what I needed was permanently mounted and connected gear, much like a pedalboard. After doing some design sketches, I came up with the following design. I’d still make a folding shelf, but have one side dedicated to the two controllers I use most for my laptop (the PC1600x fader box and the USB QWERTY keyboard), and the other side as a place to put my laptop. The side of the shelf that holds the laptop would neatly fold under the side with the controllers for use in the studio, and storing in one of the aluminum cases I have for travelling with gear (side note: check Home Depot and Lowes for these – $20 or so, and some already come with foam!).

Here are some of the pictures from construction.

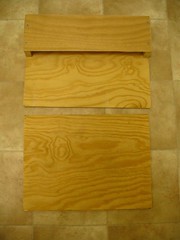
I constructed the two sides of the shelf from 3/8″ plywood, screwed together. Here you can see both sides once they were cut:
both sides of the shelf

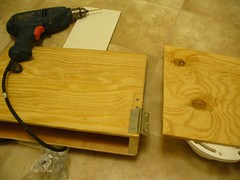
Putting the two sides together with the hinges:
Putting the hinges on

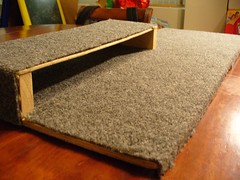
I decided to cover the shelf in carpet to prevent the nicks and dings that always happen when traveling with gear. It gives that pro rack look, too:
the completed shelf (with carpet)

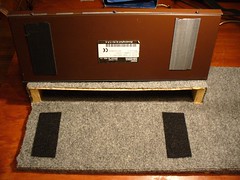
Here you can see me getting the pc1600x ready to stick down with velcro. I use this wide industrial-strength velcro, which works great:
velcro!
the velcro!

After the pc1600x went on, I added the USB QWERTY keyboard:
the rig takes shape

Here you can see the rear of the board, which has the connections for the MIDI interface (a 4 in, 4 out Edirol MPU64) and the USB hub (a 4-port Griffin USB Audio hub):
back view

Here’s the final product. It will easily sit on a keyboard stand, although it’s shown here just on the case it travels in:
the full view

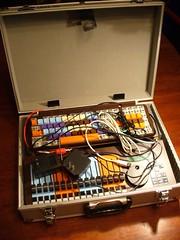
The board, folded up and in its travel case:
rig in the travel case

I’m really pleased with the final result. I now have a controller rig that I take out of its case, plug in a single power cable and a single USB cable, and have up and running in about 2 minutes (instead of the 10-15 minutes it would take me before, when I was assembling the whole rig each time).

You can see more photos, and larger details, at the chromedecay flickr site.

Update: This got picked up by Create Digital Music, a great music technology blog that I read. You can read the story and see comments at the site: Create Digital Music.