20/52: Ann Arbor-Rochester travelogue, part 1

This weekend, I went to Rochester, New York, to attend the 2010 Technology of Applied Photography and Imaging workshop. I drove out on Thursday afternoon, heading from Michigan down through Ohio, then on into Pennsylvania and finally into New York.

Here are a few photos from the trip:

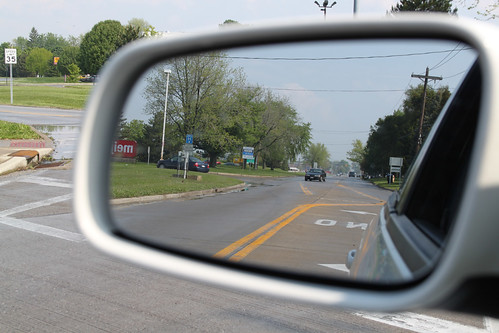
IMG_4382

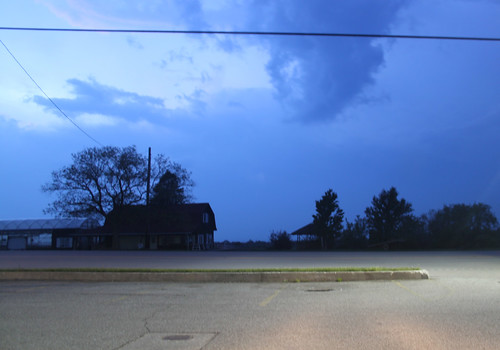
IMG_4388

IMG_4398

IMG_4408

You can see the full set of travel photos at Flickr.

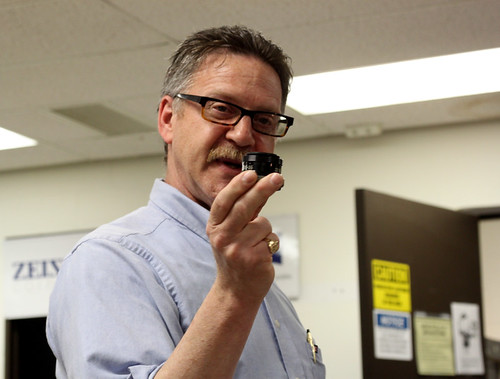
On Friday morning, the workshop began with an introduction and initial session by Andrew Davidhazy. His session focused on using photography as an unconventional measurement tool.

Andrew Davidhazy opening session

IMG_4457

Afternoon sessions discussed digital workflow and macro/microphotography.

IMG_4474

IMG_4476

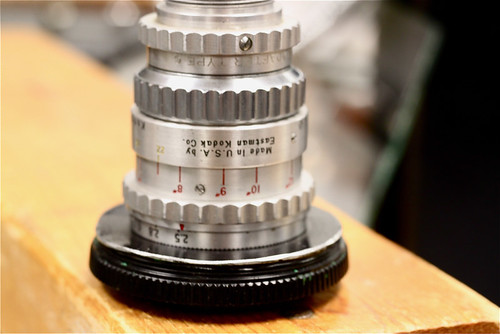
Cine mount 16mm lense epoxied to body cap
This is a cine-mount 16mm lens epoxied to the body cap for a low-cost micro photography lens.

You can see the full set of Day 1 workshop photos at Flickr.

19/52: Gibson SG Junior photos

This week’s post is late, for several reasons. I did the majority of the work on Wednesday night, shooting photos for this week’s project, but fell asleep while trying to edit them on Thursday and Friday nights. After finishing up the edits Saturday morning, our house’s power went out due to a storm! However, this week’s project is finally posted: it’s a set of photos of a Gibson SJ Junior guitar.

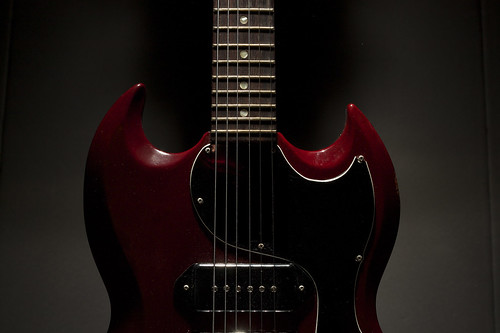
Gibson SG Junior

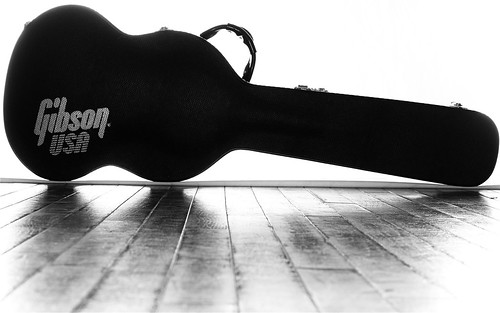
Gibson SG Junior

I shot these photos for several reasons. The guitar in the pictures above is owned by my father, who’s had it for over 40 years. It is a beautiful vintage guitar, and is actually what I learned to play guitar on when I was in college! However, my father has decided it’s time to part with it, to help fund the purchase of a different guitar, so I agreed to sell it for him.

Along with taking the standard eBay photos, I figured I’d take a few more interesting photos. The two at the top are my favorites.

I had taken a few photos of my guitar a while back, and really liked how this one came out:

ibanez a73 semi-hollowbody electric

This was my basic template for the first SG shot at the top of the post. It’s a single flash, pointed straight down at the guitar from above, and no real direct light from the front. I

I also really liked this shot, of the guitar in its case. This was done with a bedsheet gaff-taped to the wall, and the guitar case positioned right at the front of the sheet. The hardwood floor in front of it gets some reflection – I wasn’t entirely happy with how much light hit the floor, but it turned out OK.

Gibson SG Junior

I’m now getting ready to sell the guitar, but it was a lot of fun taking pictures of it before it goes out the door. You can see the full set of photos here:

http://www.flickr.com/photos/chromedecay/sets/72157623904771755/

All photos were shot with a Canon T1i with 50mm f/1.8 lens. Flashes used were a Vivitar 285 and a Sunpak 322.

Along the way, I learned a bit more about my workflow with the Canon T1i. I’ve had this camera for about 2 months now, but have not really shot much RAW footage with it – I’m usually shooting strictly JPG. This was a nice chance to shoot RAW+JPG in a controlled environment, and figure out the necessary steps for using the CR2 RAW files the T1i produces. However, Photoshop CS3 will not read .cr2 files, so I have to figure out what my options are there – possibly a newer version of the DNG Converter from Adobe, or I may need to start using Canon’s RAW software. I ended up doing all my work on the JPG versions of these photos.

17/52: DIY Vivitar to 2.5mm Sync Cable for CTR-301p

This week’s post is both late (I usually post on Friday) and less complete than I’d hoped. However, here it is: a DIY Vivitar to 2.5mm sync cable for the CTR-301p flash triggers.

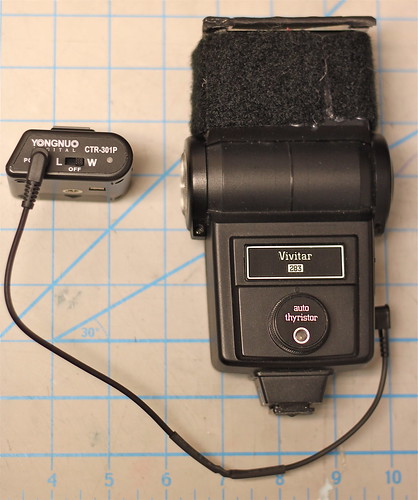
Vivitar 283 with CTR-301p trigger

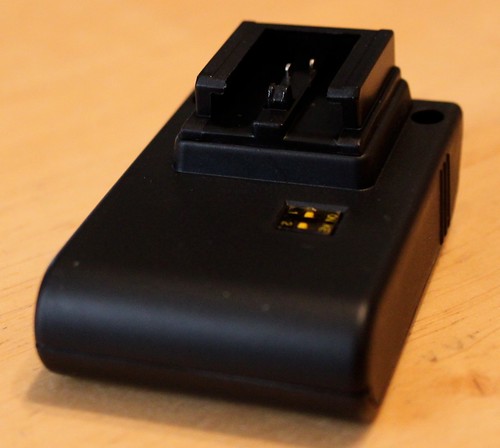
I bought a new set of flash triggers several months ago, the Yongnuo CTR-301p. They are a cheap set of triggers, and they ship directly from Hong Kong, which means it takes close to a month to receive them. However, I was originally sent the wrong style of triggers – I need a Canon-specific transmitter, and I was sent a Sony/Minolta version.

Yongnuo CTR-301P radio flash trigger: Sony/Minolta Transmitter Detail

After some haggling, I was able to re-order the correct item at a reduced price, and was hoping they would finally arrive this week in time for this 52 things post. Alas, they did not, but I was able to make some progress toward being able to use them as I intend. My main flashes are the Vivitar 285 and 283, both of which are quite old and have a high trigger voltage. I’ve heard conflicting reports about how much voltage the CTR-301p triggers are built to handle – some reports say less than 12V, and some say they’re safe up to 300V. That’s a big difference, and I’d prefer not to fry my new triggers, so I built a DIY Vivitar-to-2.5mm cable instead of using the hotshoe connection.

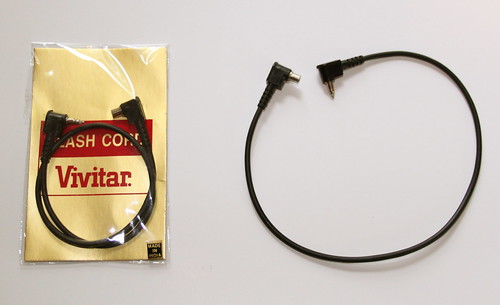
Here’s a standard Vivitar to PC sync cable. The Vivitar side is a weird, proprietary connector, which is what necessitated making a custom cable.

Vivitar to PC sync cable

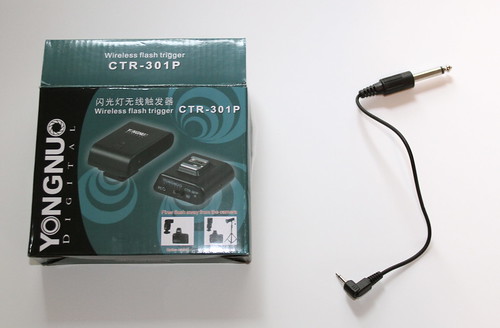
The CTR-301p comes with this cable – a short 2.5mm to 1/4″ cable, where the 2.5mm side plugs into the CTR-301p receiver.

Yongnuo CTR-301p with 2.5mm to 1/4" cable

In order to make this, I basically hacked the ends I didn’t want off both cables, and soldered them both together.

DIY Vivitar to 2.5mm sync cable
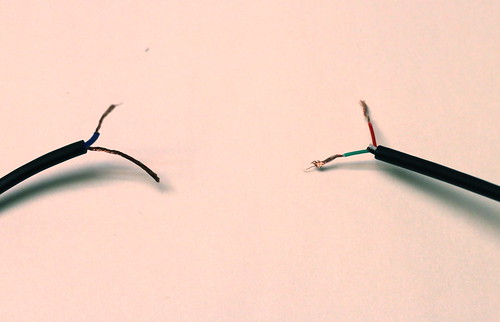
DIY Vivitar to 2.5mm sync cable: solder joints

The one somewhat unusual part of making this cable is that the mono 2.5mm cable had 4 wires for some reason – usually this would only have 2 wires. I took a lucky guess that the green wire was ground, and the red wire was hot, and it worked out the first time – the green wire from the 2.5mm cable connected to the bare ground wire from the Vivitar cable, and the red wire from the 2.5mm cable connected to the blue wire from the Vivitar cable.

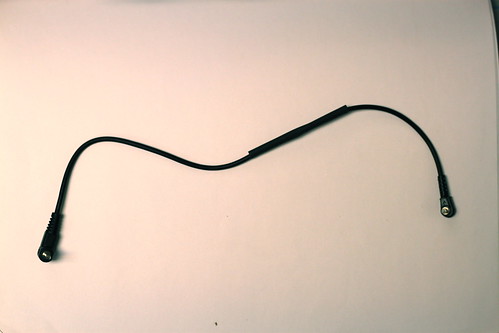
Once it was done, all that was left was to slide some heatshrink tubing over the whole thing to make it nice and tidy:

DIY Vivitar to 2.5mm sync cable

Since I don’t have the proper Canon transmitter yet, I wasn’t able to test this on the camera, but luckily the CTR-301p’s transmitter has a manual test button, and it worked properly, popping the flash every time I pushed the test button. Here’s looking forward to getting the correct version soon!

16/52: DIY Camera Jib/Crane

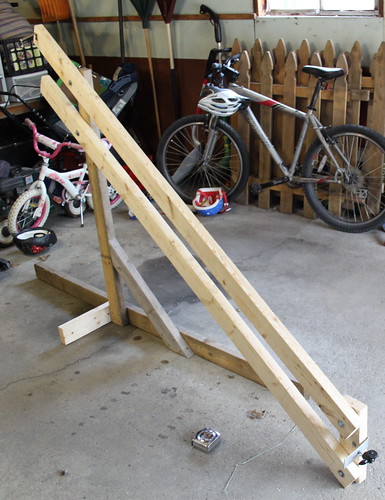
I was recently inspired by several things: Chase Jarvis’s “Cameras at Risk” blog entry, and a cheap DIY camera jib/crane at colvins.ca. This week’s project was building my own DIY camera jib/crane for getting interesting shots when shooting video.

DIY Camera Jib/Crane

I basically followed the same idea as the colvins.ca version mentioned above. This is very much a version 1.0 project, however, as there are a number of things that could be much improved. For one thing, the colvins.ca version uses 2″x2″ lumber, and when I picked up lumber for this project, I got 2″x4″ lumber. That makes the crane arm twice as heavy as it could be, although maybe it resists deflection (bending) more, too. There are other future improvements I’ll mention along the way.

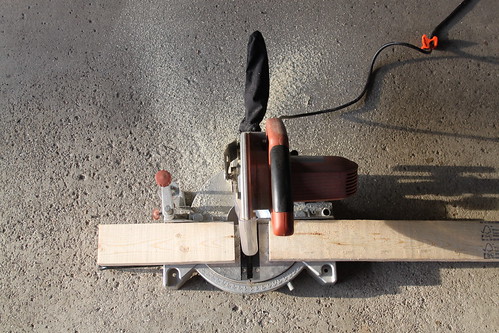
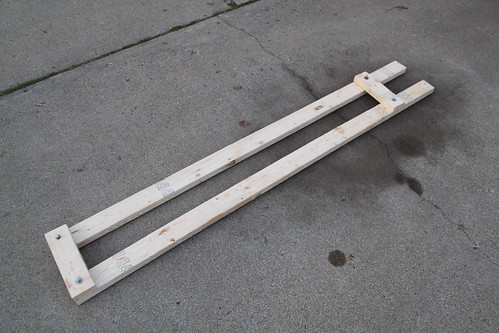
To start with this project, I measured out the 2x4s and cut off a 14″ section from each one, so the crane arm is just under 7 feet long. Then I drilled holes in the long sections, to allow the whole arm assembly to be bolted together.

DIY Camera Jib/Crane

After I had assembled the crane arm (using a small piece on the end to hold the whole thing together temporarily), I built a quick-and-easy stand. The colvins.ca article mentioned using a work light stand (which I have!) but it wasn’t working for me – the stand wasn’t sturdy enough, and I didn’t feel like fabricating the necessary bracket, so I just built a version using 2×4 lumber.

DIY Camera Jib/Crane

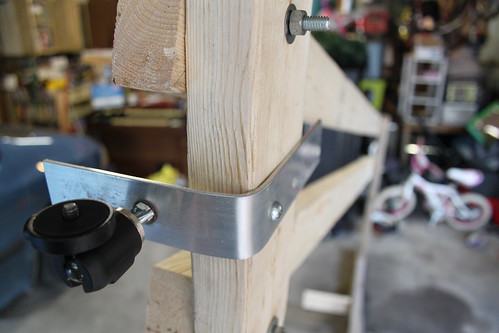
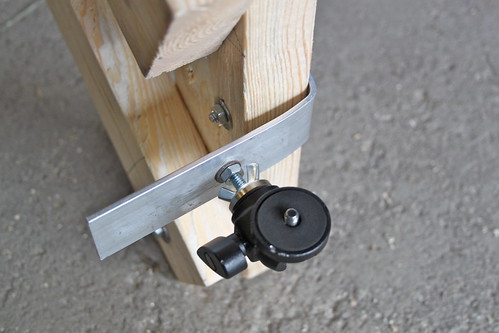
For the end where the camera attaches, I used a piece of flat aluminum stock, bent at a 90-degree angle and bolted to the end of the crane arm. A standard 1/4 x 20 bolt comes through the end, and a Manfrotto Micro Ball head attaches to that to give the camera a forward-looking orientation.

DIY Camera Jib/Crane

I didn’t get much of a chance to shoot test footage yet, as I only finished it late this afternoon, but I did get a couple of quick shots before I had to put it away. You can see the test footage here:

Things that could be much improved:

  • The stand is pretty wobbly – the vertical 2×4 is somewhat warped, and it only has ground support on one side.
  • It would be great to make the whole thing much more portable. I’m thinking of something perhaps made from PVC pipe or something similar that could be quickly assembled, but broken down into smaller pieces for transportation (4-foot long sections at maximum would make this much easier to take other places).
  • The bracket that the camera attaches to is pretty bare-bones; it’s not that stable, and it would be nice if the bolt that the ballhead and camera attach to was vertically oriented.
  • There’s no way to see the camera’s output, so a small video monitor would be a good addition
  • Long-term, I’d like to use pan/tilt brackets and servomotors to make the camera remotely controllable!

For now, I’m quite pleased with this version 1.0 jib/crane, and I’m looking forward to shooting some more interesting video with it.

13/52: Charlotte Photos, Part 2

As mentioned in last week’s post, I recently spent some time in Charlotte, NC. I was thrilled to be able to spend some time hanging with my friend Kyle Tait (who’s making some music again after a long break). I’d planned on using our time together to do a long photowalk around Charlotte, taking tons of pictures, but as it turned out our conversation and catchup was more important and interesting. Life happens that way sometime, and I wouldn’t change how I spent that time at all.

However, I did still manage to snap some additional Charlotte pictures after last week’s post. I was in Charlotte for the International Technology and Engineering Educator’s Association conference (photos at my personal Flickr stream), and the majority of the conference was held at the Charlotte Convention Center.

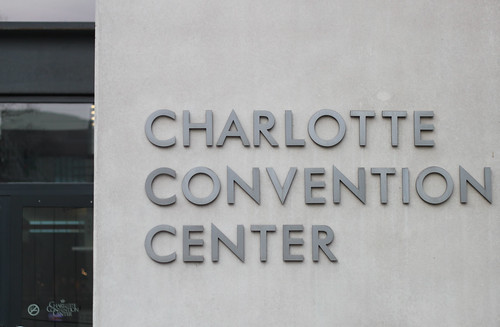
13/52: Charlotte Convention Center

On Saturday, I was able to slip away from the fast-paced conference sessions for a few minute, and I snapped some shots of the Charlotte Convention Center’s architectural details. Architectural work has been a long-time focus of my photography work, and I was thrilled to walk into the Convention Center the first day and see all the great typography and architectural details. For example, the signage was all set in Futura, one of my favorite typefaces.

13/52: Charlotte Convention Center

This week’s project, then, is a small set of what I captured and saw at the Charlotte Convention Center.

12/52: Charlotte Photos, Part 1

I always enjoy being in a new city and getting a chance to explore it. Taking photos is one way I do that, and this week’s 52 things project is a set of photos from Charlotte.

Finally: at the risk of making a shameless plug, I took the majority of these on Thursday night while listening to Joshua Schnable’s “Live at FFMUP” live set from the chromedecay live 2009 release:

It made for excellent urban exploration music.

6/52: smoke photos + new DIY collapsible softbox

This week, I worked on two photography projects for 52 things: smoke photos, and a new DIY softbox for one of my flashes.

Part 1: smoke photos

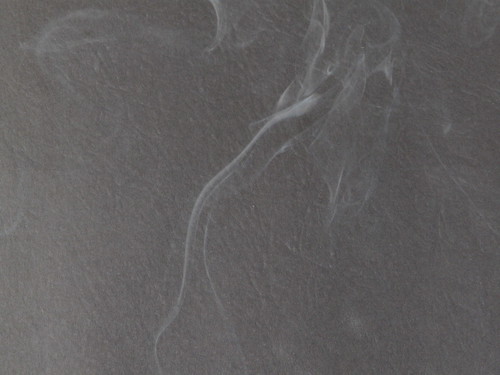
smoke: blue on black

After I made my new macro photo box, I started thinking about projects that it would work well for. I’ve done some water photos before (though none that I really loved), but what captured my imagination this week was the idea of photographing smoke.

I set up the macro box, put my Vivitar 283 flash on a boom stand, set my camera up on the tripod, and got out a stick of incense. After taking a few shots, I soon realized that the pure white background of the macro box was not working at all – the smoke just didn’t show up against the white at all. I then tried a black background – here’s an example:

smoke photo (attempt 1 example)

After not much success with that, I decided to see how others had approached this subject matter, and found an excellent article on the subject:

http://www.sensitivelight.com/smoke2/

I realized that I was letting far too much light from my flash onto the black background, and as a result it was washing it out. I adjusted the box so the flash was completely flagged off from the background. Here’s what it looks like (the lighter is there so I could focus on it – autofocus is useless with smoke, so I used it to set focus, then shifted over slightly so it was out of the frame).

smoke photos: setup (detail)

Once I popped a test shot, my jaw dropped.

smoke: blue on black

I shot a number of smoke pictures, and with only a little cleanup in Photoshop, I was completely happy with the results.

View the complete set of smoke photos via Flickr.

Part 2: collapsible DIY softbox for Vivitar 283 flash

I also started thinking about my softbox situation. I made a small DIY softbox for the Vivitar 283 a while back, but it had two distinct disadvantages: it wasn’t very easy to stick in a bag, and the front diffuser material was tissue paper, which is quite delicate. I therefore decided to solve both of those problems with a new, slightly larger softbox that would fold up for transport.

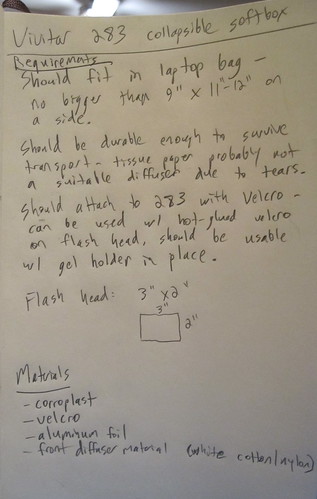
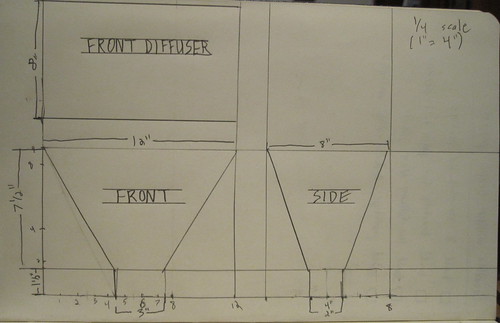
As a technology teacher, I made myself sit down and think about this as a design problem, sketching out some requirements and a 3-view drawing.

DIY collapsible softbox

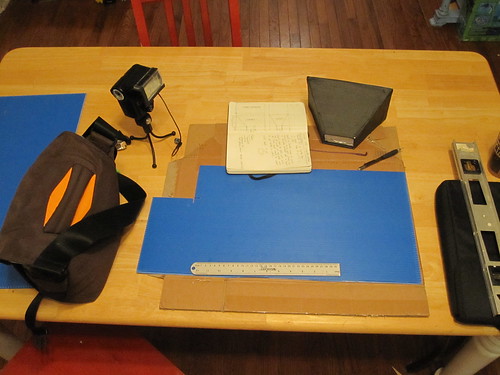
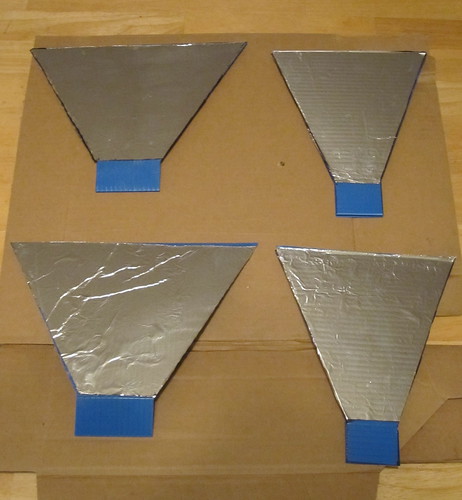
Once my design was set, I got out materials and started construction.

DIY collapsible softbox

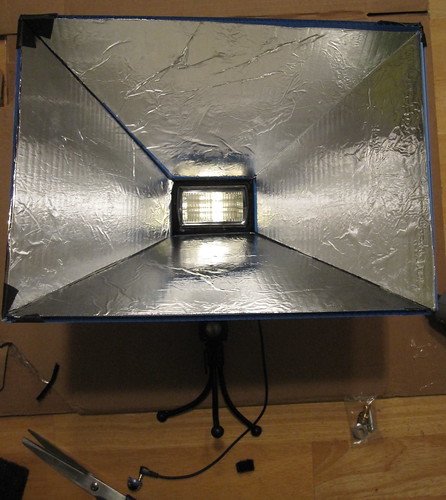
It’s not quite done yet, as I have yet to finalize the front diffuser panel, but I have some white shower curtain material that I think is going to work great. Once it’s finished I should be able to use it quite a bit since it will fit in my laptop bag, making it easily portable.

DIY collapsible softbox

View the complete set of DIY softbox photos via Flickr.

4/52 – new Strobist macro lightbox plus DIY photography gear roundup

A few years ago, I saw an article on the excellent Strobist site, describing how you could build a cheap, easy macro studio in a box – the $10 Macro Photo Studio. I went ahead and built one, and it looked like this:
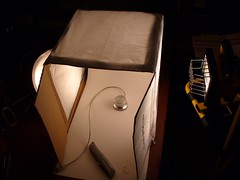
new Strobist $10 macro lightbox

It was quite decent, but unfortunately got destroyed because it was too delicate and I never had a good place to store it (where do you stick a big, delicate box that’s mostly comprised of tissue paper?).

I therefore decided to build a new one for this week’s 52 things entry, making a few modifications along the way. I used the same idea as the original Strobist article, but made a few important changes. First off, I decided it would have to be collapsible, to prevent the issue I’d run into with the first one. As you can see below, this is what it looks like when unfolded:
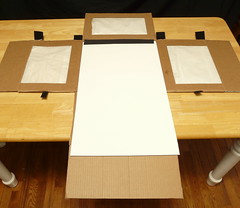
new Macro lightbox: unfolded

The sides are held together at the top and bottom with Velcro strips that allow it to be quickly assembled or broken down:
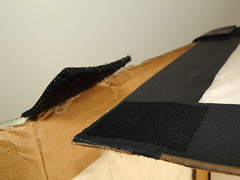
new Macro lightbox: corner detail

Here’s what it looks like all assembled:
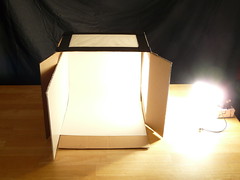
new Macro lightbox: setup shot

I shot a number of test shots using two flashes: a Sunpak 322s on one side, and a Vivitar 283 on the other side, and got excellent diffused light with minimal shadows, like this one of my son’s Bionicle invention (he’s got a bunch of Bionicles made to his own designs, using parts from the kits he has; check out his own site to see more of what he’s up to):
Macro lightbox test: Bionicle

Unfortunately, the Sunpak died right at the end of my first test session, and I’m not sure why (it seems to get a charge, but the flash never fires). That means I’m down to one flash, the Vivitar 283. It works well enough, though, as you can see from today’s photos.

I decided to use this as a chance to do a roundup of some of the DIY photo gear I’ve made over the past year or two.

This is a DIY mic stand to tripod stud adapter. I have a number of mic stands in my studio, including a couple boom stands, but only one tripod. That makes it difficult to place my flash, cameras, etc depending on the situation (for my recent chromedecay behind the scenes video, for example, I used an overhead camera shooting down, mounted on a boom stand with this adapter).

Macro lightbox test: DIY microphone stand to tripod stud adapter

It’s just a metal stud that came with my mic stands, drilled out to allow a 1/4 x 20 bolt (the standard for tripod-mounted camera gear) to be passed through. A wing nut and washer allow it to be tightened onto whatever it’s holding.

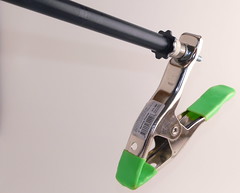
I love these cheap clamps from Home Depot, and when you take the cushion off one of the arms, there’s a perfect spot to pass a 1/4 x 20 bolt through. That means it can be used either as a clamped tripod mount, or as a clamp on the end of a mic stand.
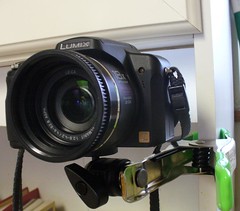
Panasonic Lumix DMC-FZ18 on DIY superclamp

Macro lightbox test: DIY boom clamp

Finally, here’s a homemade diffuser (the “salsa bottle diffuser”) whose origins you can easily guess:
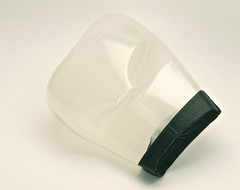
Macro lightbox test: DIY diffuser

It slips over the end of the Vivitar and diffuses the light nicely.
Check out my Flickr set for more photos of the new Macro lightbox in action, and more DIY photo/video gear.